Instructions
WordPress Theme: Simple Notepad
This is the “Simple Notepad” theme instructions page. We have tried our best to keep it as simple as possible. If you think it can be made even simpler let us know we will be glad to change it. Let’s start!
On the left side, you can see the table of contents of this documentation. Jump to the section you want, or read it all through – your choice. Let’s move on!
Purchase process
To start using the “Simple Notepad” theme, you need to make a purchase on the official page of this theme. To do this, select a license suitable for your case and make a payment. Secure payment of the theme is done using the platform of our partner Gumroad.
After the successful completion of the purchase, you will receive an email receipt with a button through which you can download a copy of the theme.
Download the latest release
Delivery of the “Simple Notepad” theme is done using the platform of our partner Gumroad.
There are two methods to download the latest release of the theme. You can download it directly from the Gumroad website, or you can download it using the button in the email with a receipt.
- After purchasing a copy of the “Simple Notepad” theme, you should have received an email with a receipt from Gumroad with a link to download the latest release of the theme. This link should be fine for future downloads of the theme, so please keep the email save for later usage.
Don’t worry if you deleted this email. We periodically send email notifications (with the download information) whenever there is a major update of the theme. We do not send email notifications very often so as not to annoy our lovely customers.
- If you have a Gumroad account, you are able to access your Gumroad purchases at any time through your Library. Please visit the How do I Access My Purchase page on the Gumroad website to learn more.
Installation
Install “Simple Notepad” theme just as you would any other WordPress theme.
There are two methods to install the theme. You can install it directly from the WordPress Admin Area, or you can install it manually by first downloading the theme.
Automatic installation (via WordPress Admin Area):
To install the theme automatically (from the WordPress Admin Area), please perform the following steps:
- Download the ZIP archive with this theme to your computer. After downloading you should have a ZIP archive called
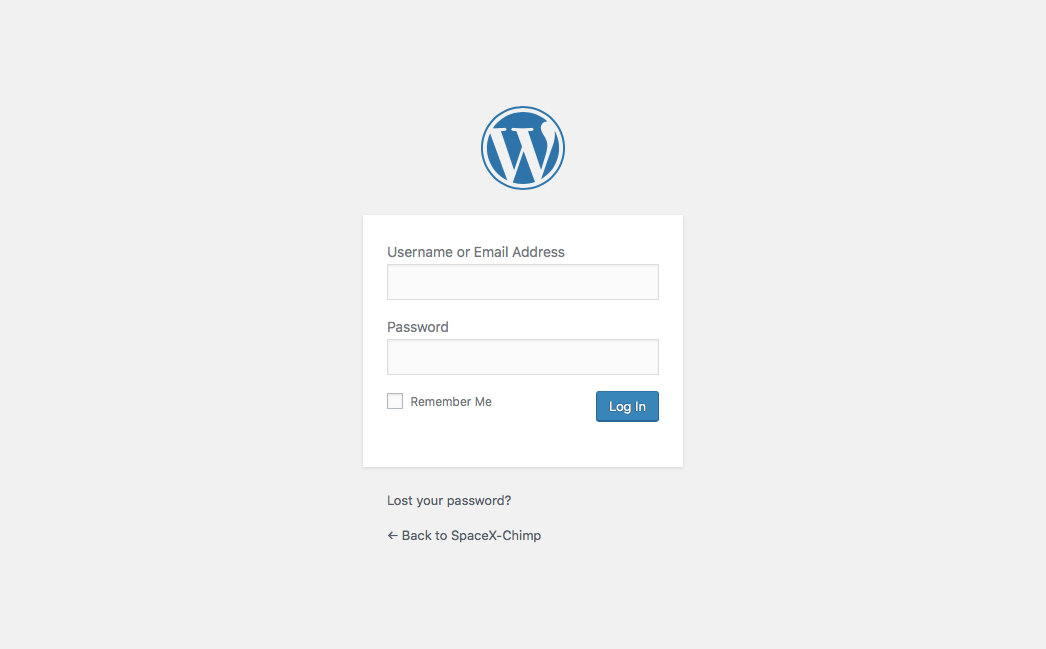
simple-notepad.1.0.zip. This is a compressed file containing all the folders and files required for the theme to function properly. - Log in to Admin Area of your WordPress website.
- Go to
Appearance->Themes. - Click
Add New->Upload Theme->Choose File, and browse the ZIP archive with the theme. Click theInstall Nowbutton. Wait a few seconds until the theme is installed. - Hover the mouse over the “Simple Notepad” theme title or preview image and click the
Activatebutton to activate the theme. - Go to
Appearance->Customizefor further customization of the theme.
Manual installation (via FTP access)
To install the theme manually (by simply uploading all files via FTP or SFTP), please perform the following steps:
- Download the ZIP archive with this theme to your computer. After downloading you should have a ZIP archive called
simple-notepad.1.0.zip. This is a compressed file containing all the folders and files required for the theme to function properly. - Unzip the ZIP archive with this theme on your computer. You’ll get the folder
simple-notepad-sxc.You need to preserve the directory structure in the archive when extracting these files.
- Access your server via FTP or SFTP.
If you aren’t sure how usually your web hosting provider will have instructions somewhere on their website.
- Browse to the directory
wp-content/themes/.The location of the folder
wp-contentdepends on your host’s setup. Typically, the folderpublic_htmlcontains all the files of the website, among which you will find this folder. Please contact your web hosting company to get help if you can’t find this folder. - Upload the theme folder
simple-notepad-sxcfrom step 1. Wait for the uploading to complete, it may take several minutes. Once the upload complete, the theme should be inwp-content/themes/simple-notepad-sxc/on your server. - Log in to Admin Area of your WordPress website.
- Go to
Appearance->Themes. - Hover the mouse over the “Simple Notepad” theme title or preview image and click the
Activatebutton to activate the theme.Note: If the theme preview is blank, do not activate the new theme without investigating further. Your website may not be displayed correctly, otherwise.
- Go to
Appearance->Customizefor further customization of the theme.
Troubleshooting installation issues
A common issue that can occur when installing a WordPress themes is "The package could not be installed. The theme is missing the style.css stylesheet." error message being displayed when uploading or activating the theme. One of the reasons you may receive this error is if you have uploaded the incorrect file.
The theme package that you downloaded from Gumroad (where you purchased the theme) is called Simple_Notepad.zip and includes a “parent theme” and a “child theme”.
To solve the issue simply extract/unzip the theme package you downloaded and upload only the simple-notepad.1.0.zip file which is included.
Update theme to new release
The “Simple Notepad” theme can be updated to the new release just as you would any other premium WordPress theme.
We have three types of updates:
- Adding new features - We add new features to the theme whenever we have a new cool feature requests by our customers, as well as our team.
- Code improvement - This makes the theme more stable and faster, and also improves security.
- Solving bugs or issues - If any bugs or issues appear due to browser updates or WordPress version changes, we make sure to update the theme ASAP to keep you and visitors of your website safe.
Regardless of the type of updates, they should be applied as soon as conveniently possible.
Automatic update (via WordPress Admin Area):
Unfortunately, there is no way yet to update the theme automatically. Sorry for the inconvenience. But we will do our best to find a way to change this as soon as possible. We plan to implement an automatic theme update system in one of the upcoming theme updates, so that you no longer have to install updates manually.
Update via FTP or SFTP:
To update the theme manually (by simply overriding all files via FTP or SFTP), please perform the following steps:
- Download the ZIP archive with the new version of this theme to your computer. After downloading you should have a ZIP archive called
simple-notepad.1.0.zip. This is a compressed file containing all the folders and files required for the theme to function properly. - Unzip the ZIP archive with the new version of this theme on your computer. You’ll get the folder
simple-notepad-sxc.You need to preserve the directory structure in the archive when extracting these files.
- Access your server via FTP or SFTP.
If you aren’t sure how usually your web hosting provider will have instructions somewhere on their website.
- Browse to the directory
wp-content/themes/.The location of the folder
wp-contentdepends on your host’s setup. Typically, the folderpublic_htmlcontains all the files of the website, among which you will find this folder. Please contact your web hosting company to get help if you can’t find this folder. - It’s best to have a backup, so download the theme folder
simple-notepad-sxcto your computer. - Upload the theme folder
simple-notepad-sxcfrom step 2, with replacing the current folder of the theme. Wait for the uploading to complete, it may take several minutes. Once the upload complete, the theme should be inwp-content/themes/simple-notepad-sxc/on your server.Important! Sometimes files are deleted inside the theme folder so make sure that your program is deleting all files and uploading the new ones when it overrides instead of simply “updating newer files”. It can cause issues if you have files on your server inside the theme folder that are no longer used in the theme itself.
Note! After you are done updating a theme please also clear your website and browser cache to prevent errors (this should be done when updating any theme or plugin).
License key
You will receive a license key along with your purchase confirmation. This key allows you to get updates for the purchased WordPress theme and get access to premium support.
The license key does not need to be entered anywhere in the theme. But the license key may be needed in the future, so do not take it away.
Customization
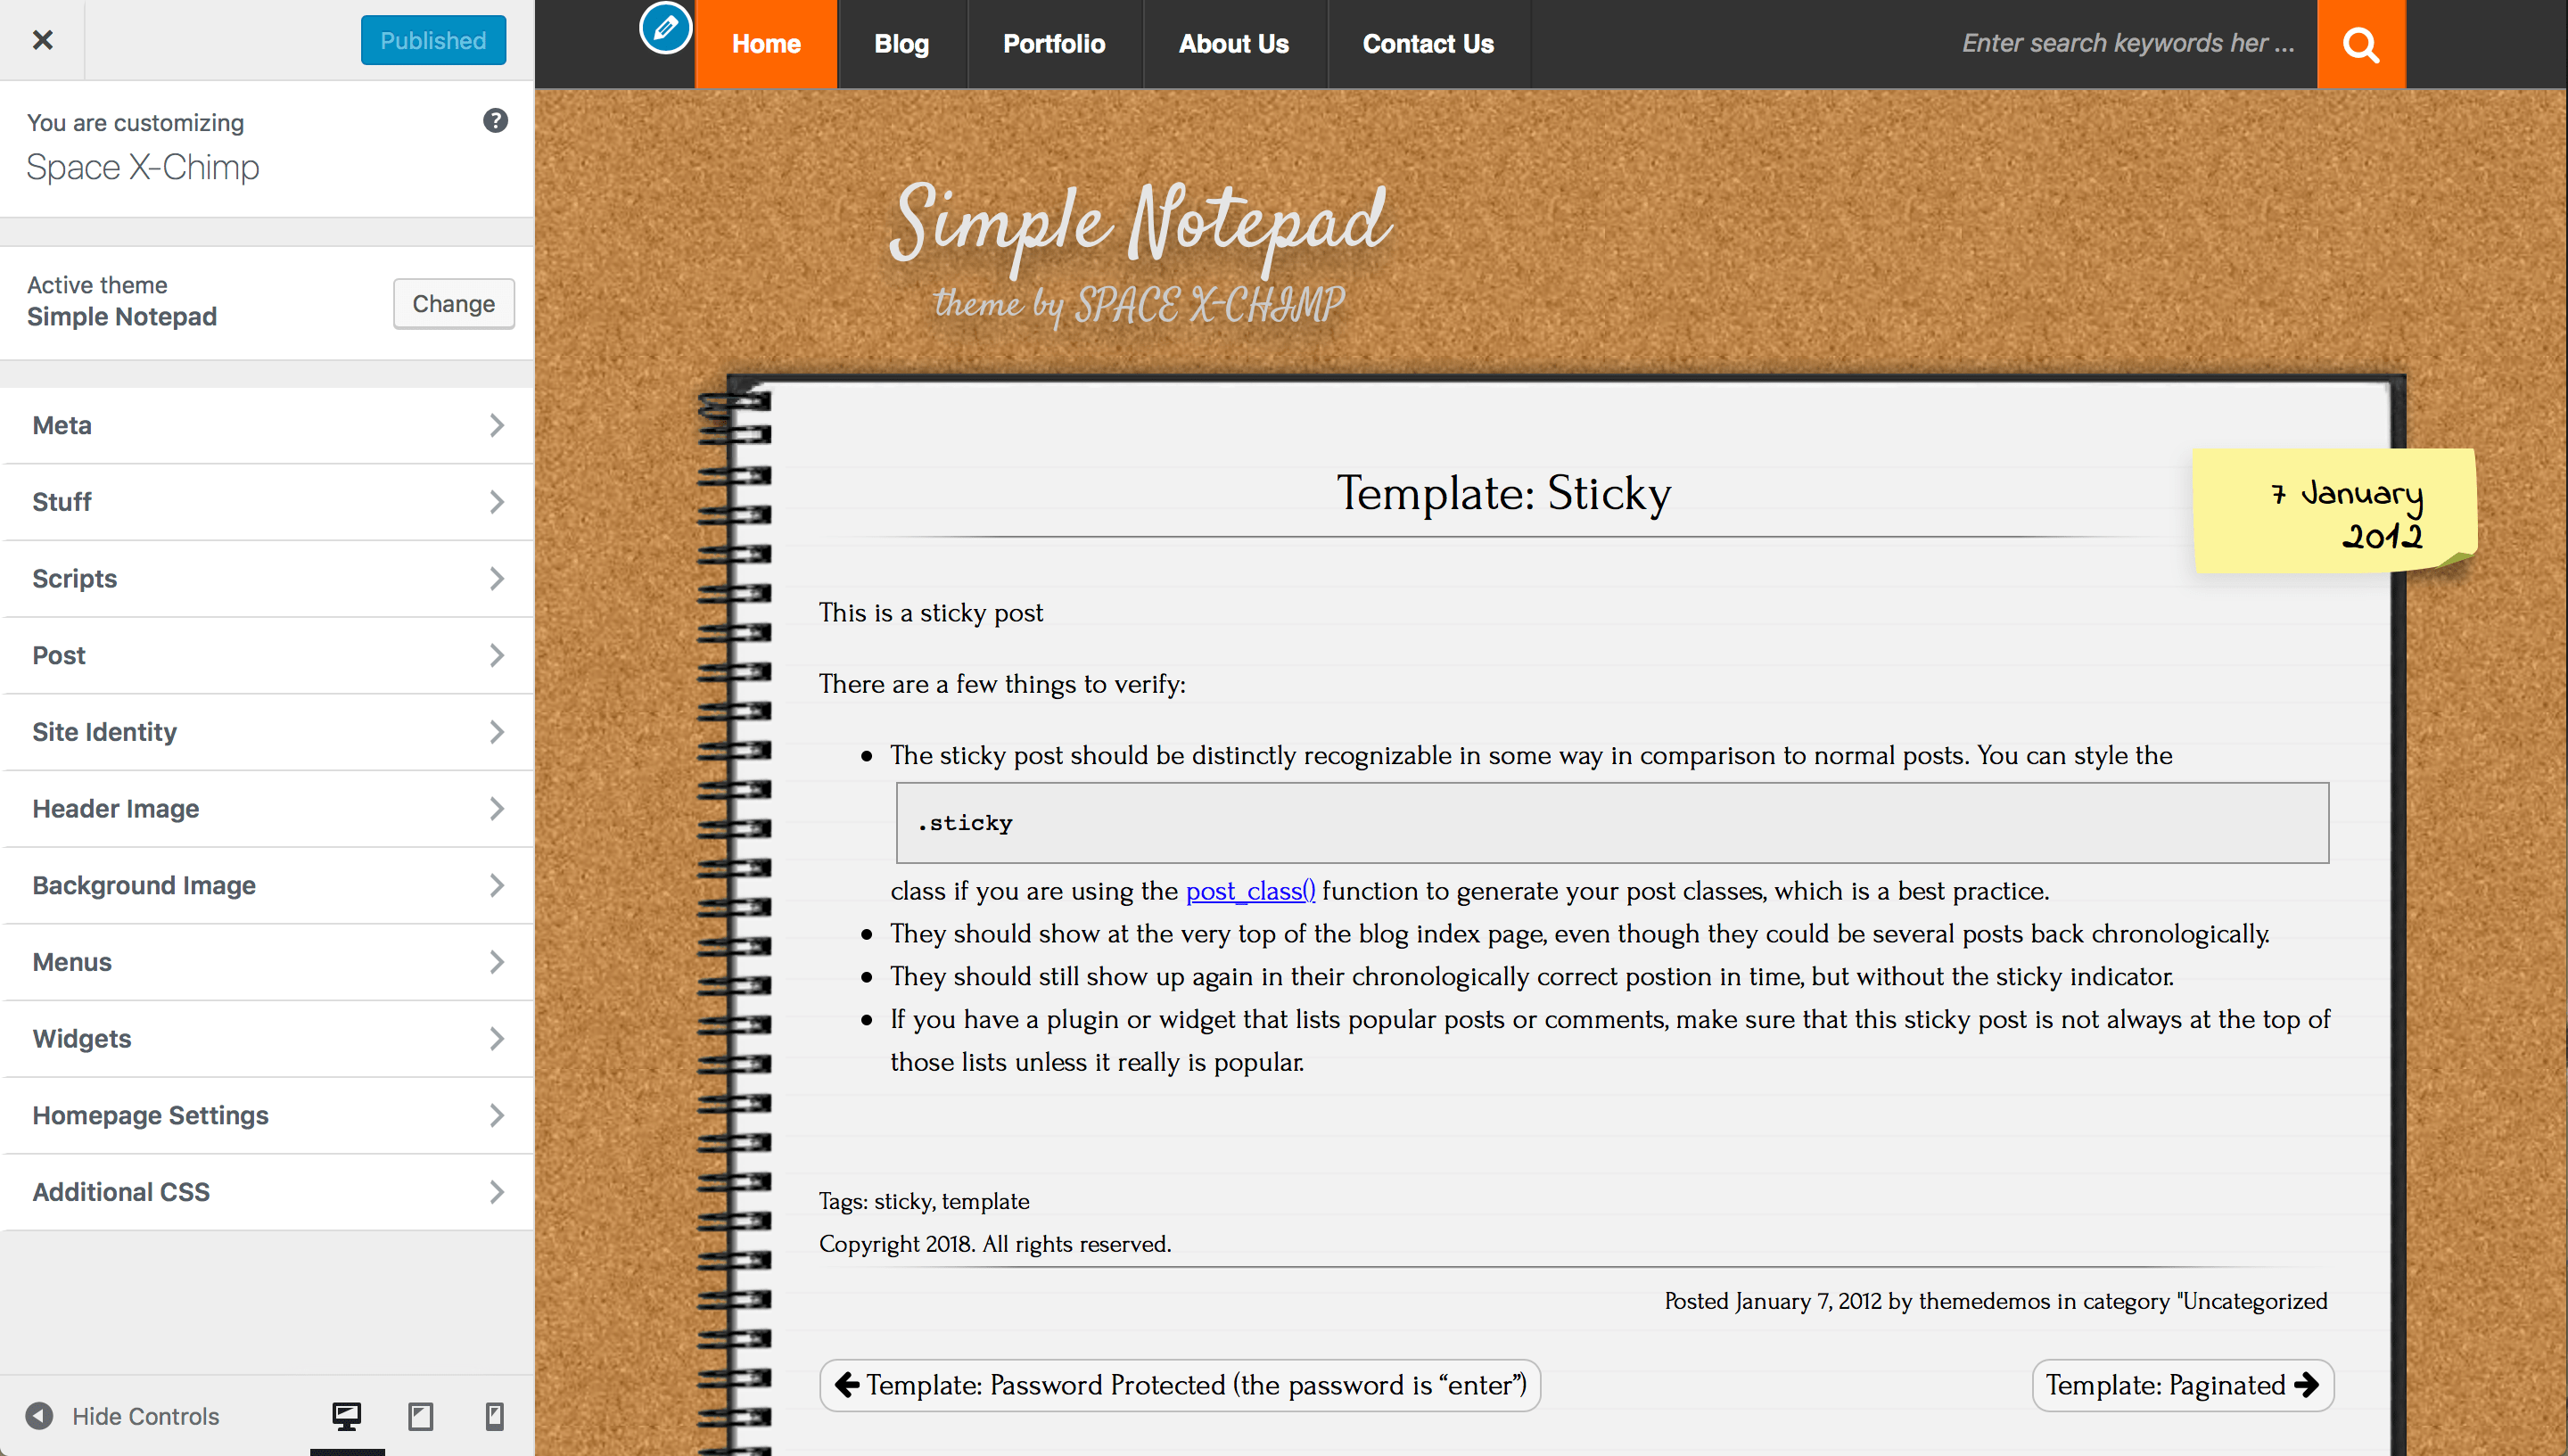
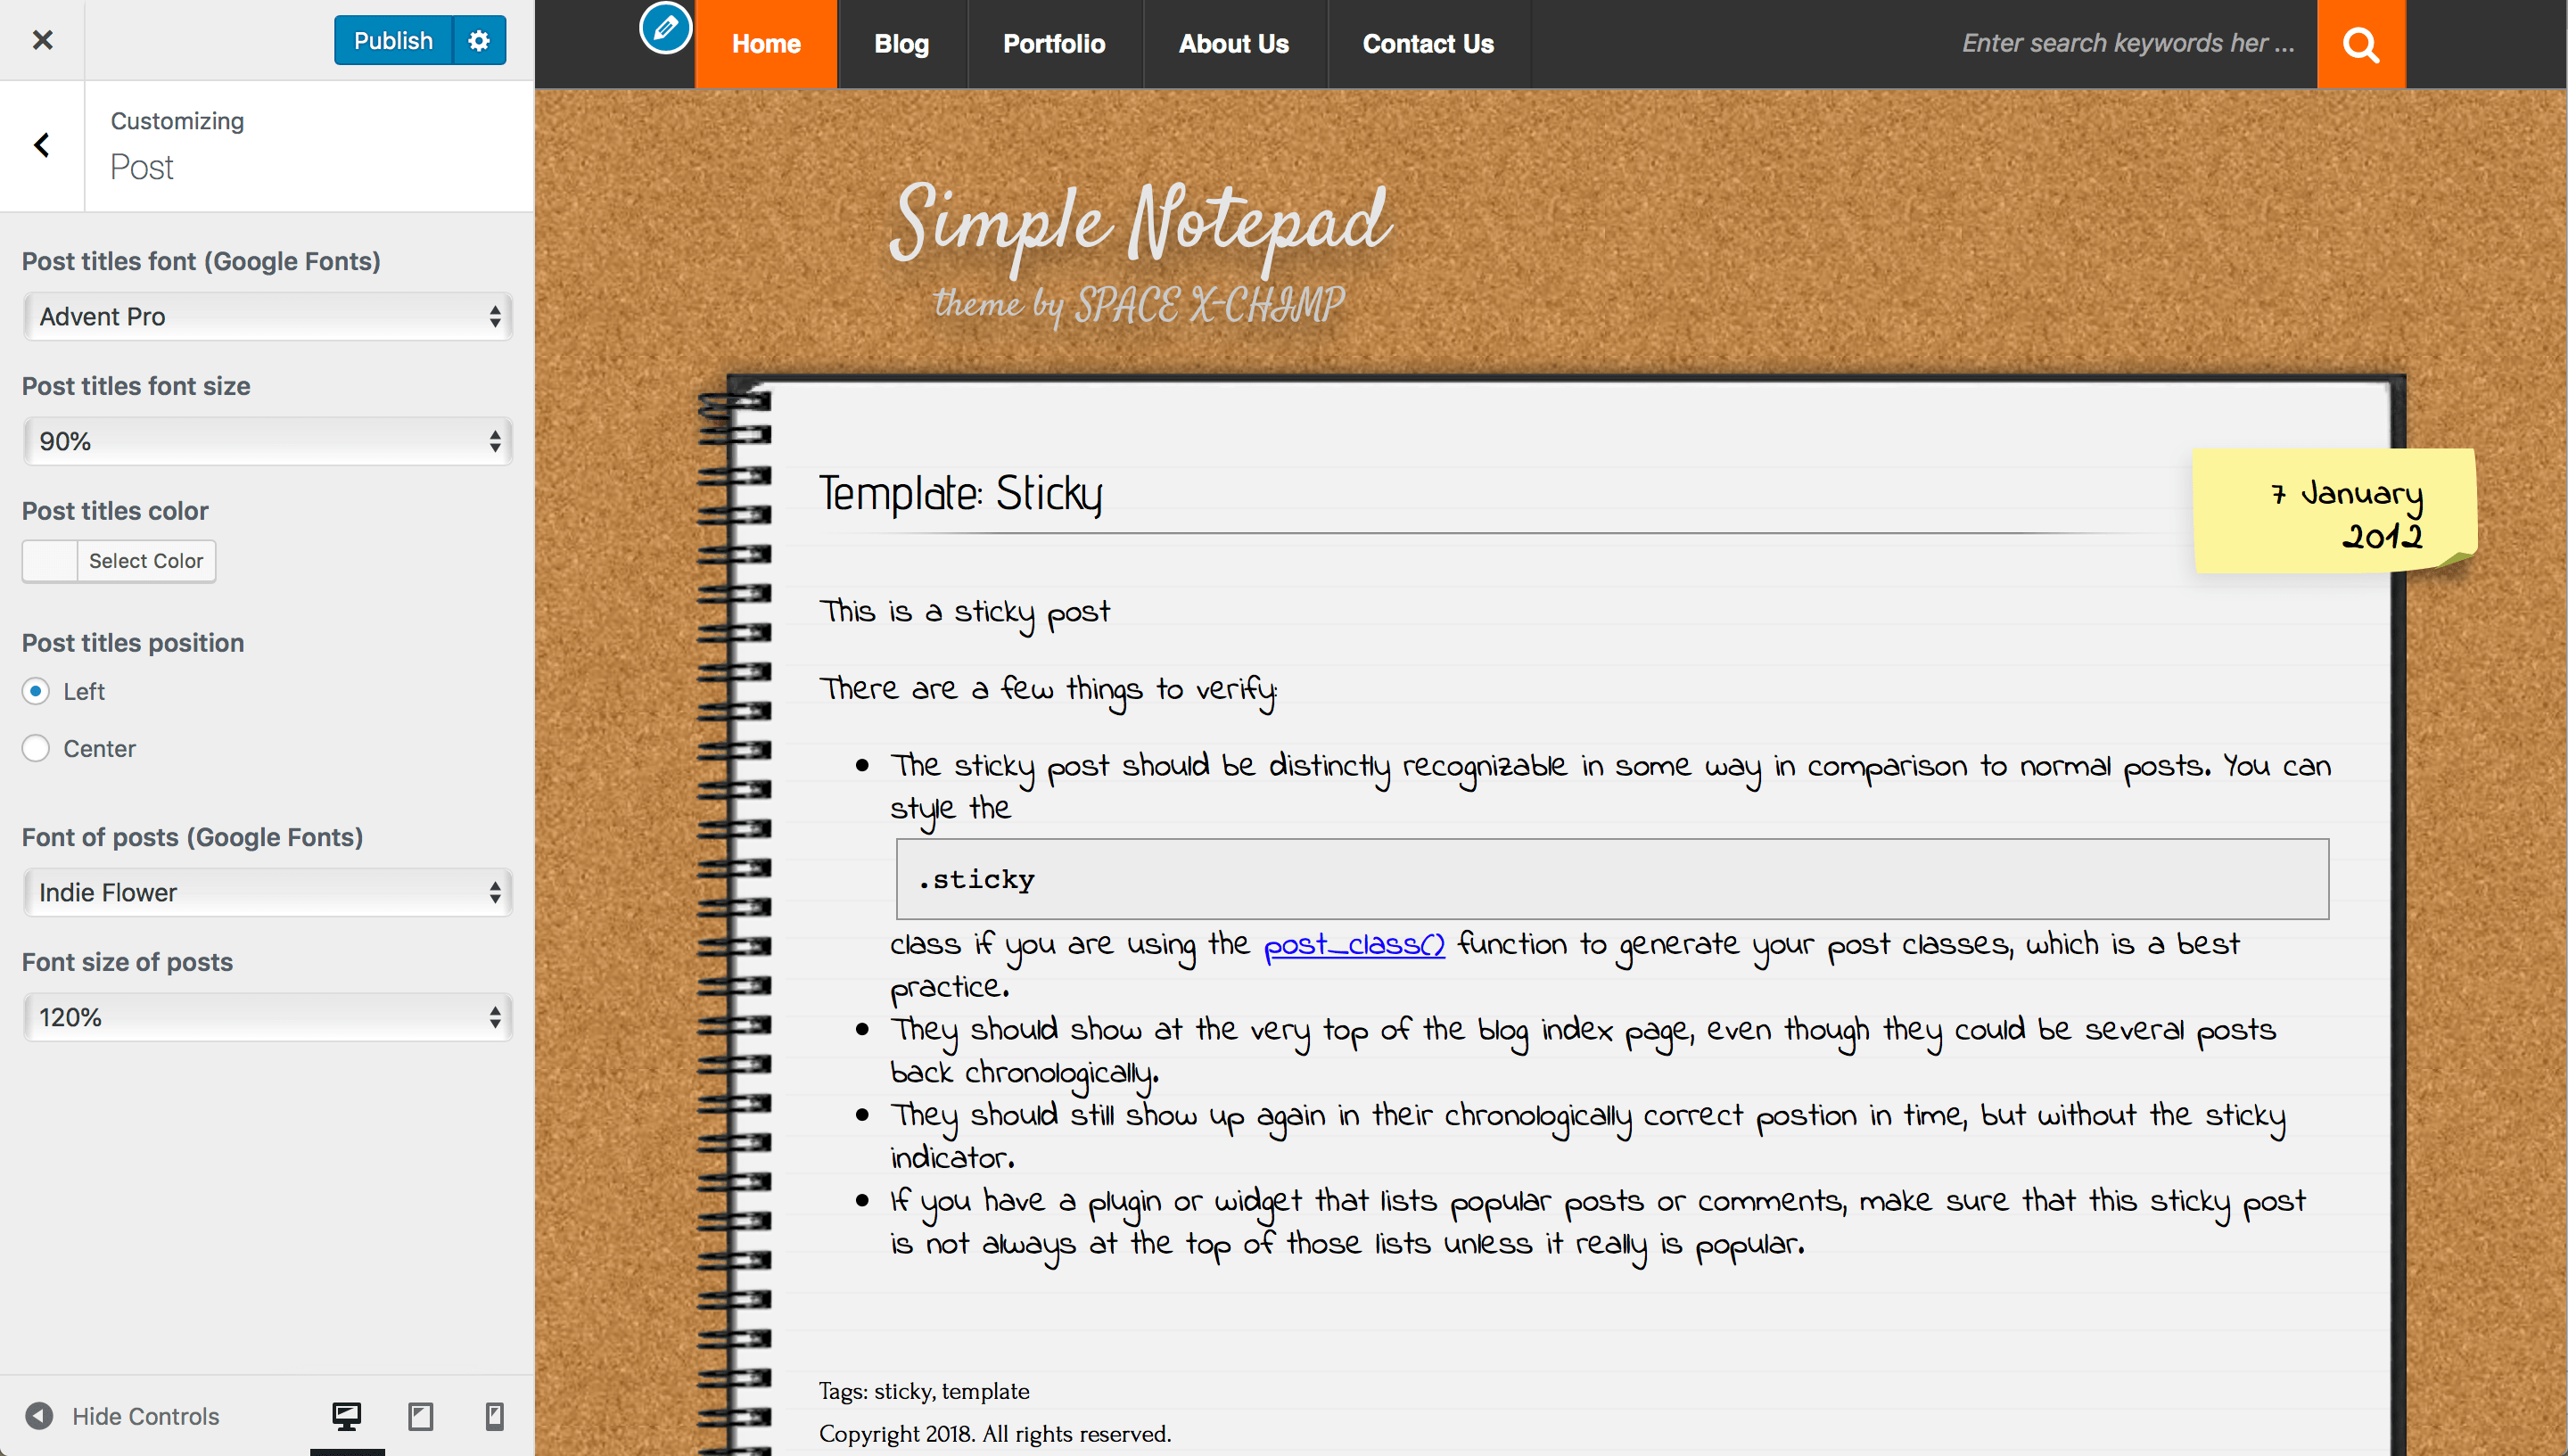
Our programmers and designers have done a great job to make the theme easily customizable using the WordPress Customizer interface.
Among the many options in the WordPress Customizer interface, you can find options for changing the font of title and content on posts/pages. Support for the Google Font library is already built into the theme. So you can choose from any of the 847 fonts included in the Google Font library with one click. These fonts include handwritten fonts (for example, Indie Flower), and there are also special fonts such as Vietnamese which you can see here. You can use the Google Fonts website to find a font you like, and then simply select it from the list in the WordPress Customizer interface on your website.
To customize “Simple Notepad” using the built in options, “Simple Notepad” should already be active:
-
Log in to Admin Area of your WordPress website.
-
Go to
Appearance->Customize.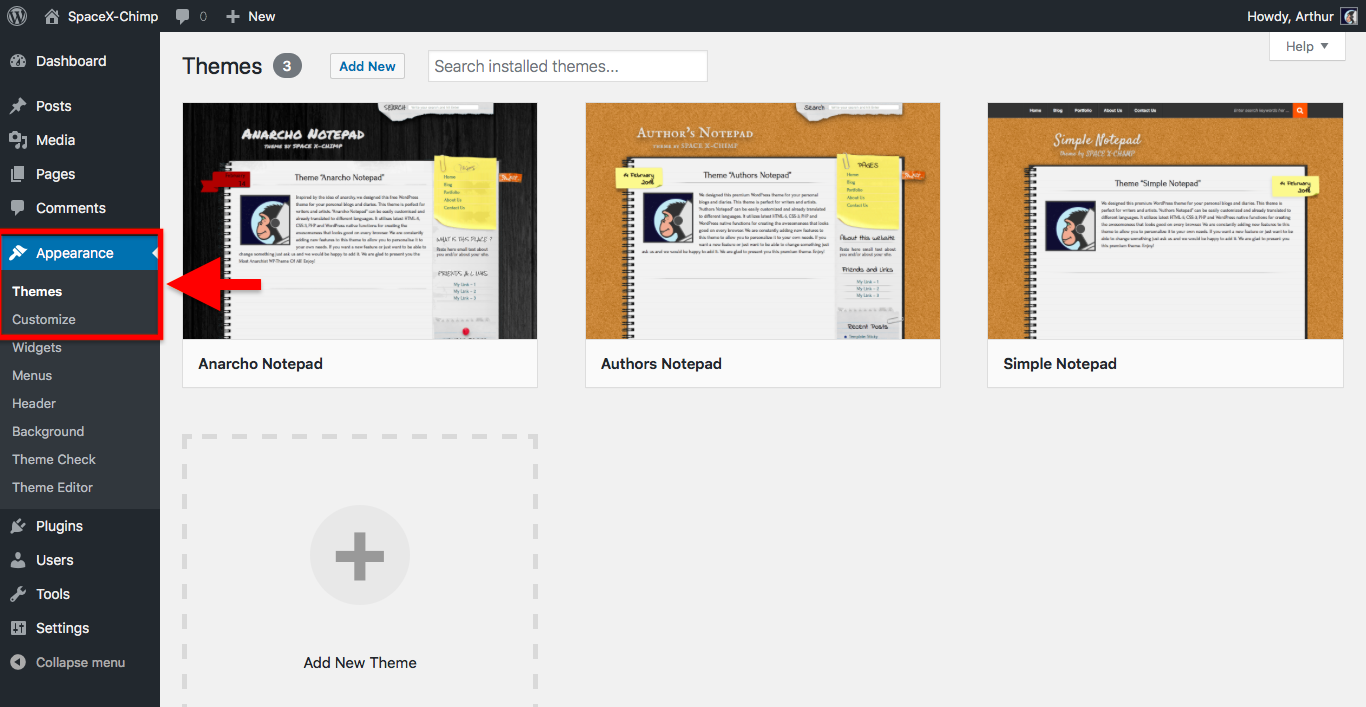
-
A page explaining the options will be displayed. Select the desired options.
-
Click the
Publishbutton to publish your changes.
Manual customization
Please use a child theme for the manual customization of the theme. You do not even need to create a child theme by yourself, we already did it for you. You can find it in the downloaded theme package.
A child theme is a theme that inherits the functionality of another theme, called the parent theme. Child themes allow you to modify, or add to the functionality of that parent theme. A child theme is the best, safest, and easiest way to modify an existing theme, whether you want to make a few tiny changes or extensive changes. Instead of modifying the theme files directly, you can install a child theme and override within.
Why use a Child Theme? Here are a few reasons:
- If you modify an existing theme and it is updated, your changes will be lost. With a child theme, you can update the parent theme (which might be important for security or functionality) and still keep your changes.
- It can speed up development time.
- It’s a great way to get started if you are just learning WordPress theme development.
You can read more about child theme in the Codex.
GDPR (EU) compliant

What is GDPR? The General Data Protection Regulation (GDPR) is a European Union (EU) law taking effect on May 25, 2018. The goal of GDPR is to give EU citizens control over their personal data and change the data privacy approach of organizations across the world. After May 25th, 2018, businesses that are not in compliance with GDPR’s requirement can face large fines up to 4% of a company’s annual global revenue OR €20 million (whichever is greater).
Does GDPR apply to my WordPress website? Yes. It applies to every business, large and small, around the world (not just in the European Union).
This theme is ready for the General Data Protection Regulation (GDPR) (EU). To make the theme a GDPR compliant using the built in option simply do the following:
-
Log in to Admin Area of your WordPress website.
-
Go to
Appearance->Customize. -
A page explaining the options will be displayed. Select the
Stuffsection.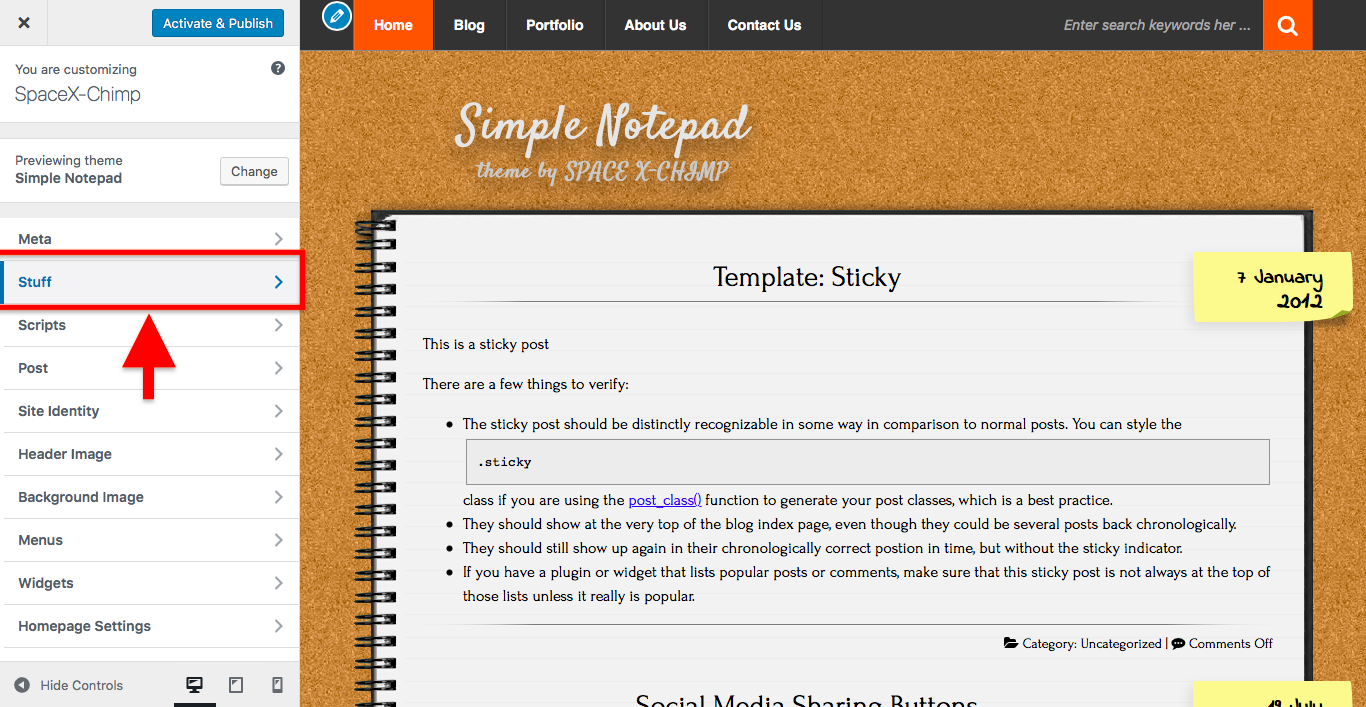
-
Check mark the option
Disable the loading of Google Fonts.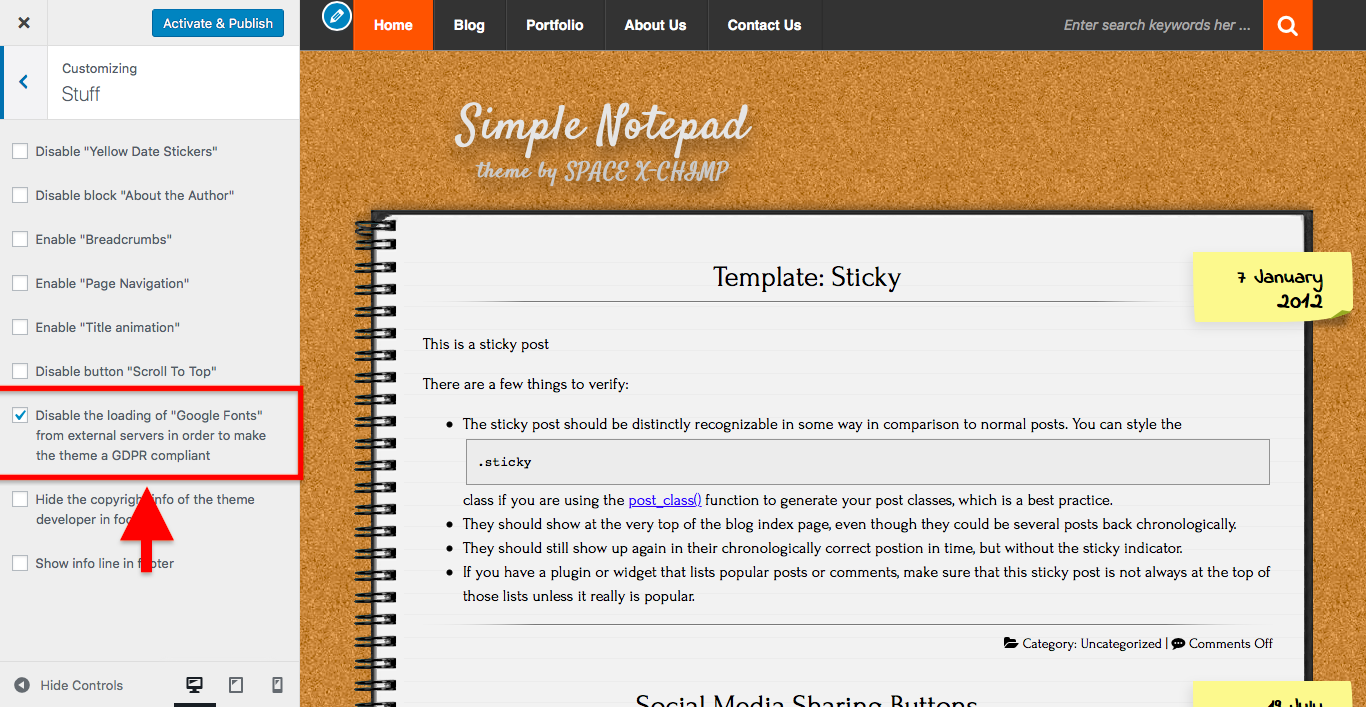
-
Click the
Publishbutton to publish your changes.
Note! This will lead to the non-operation of the option for selecting fonts from the online library “Google Fonts”. You will need to manually download the desired fonts and integrate into your website.
Please be sure to let us know if you find the incompatibility of our theme with the requirements of the GDPR. And we will do our best to solve this issue as soon as possible.
Date tag (Yellow sticker)
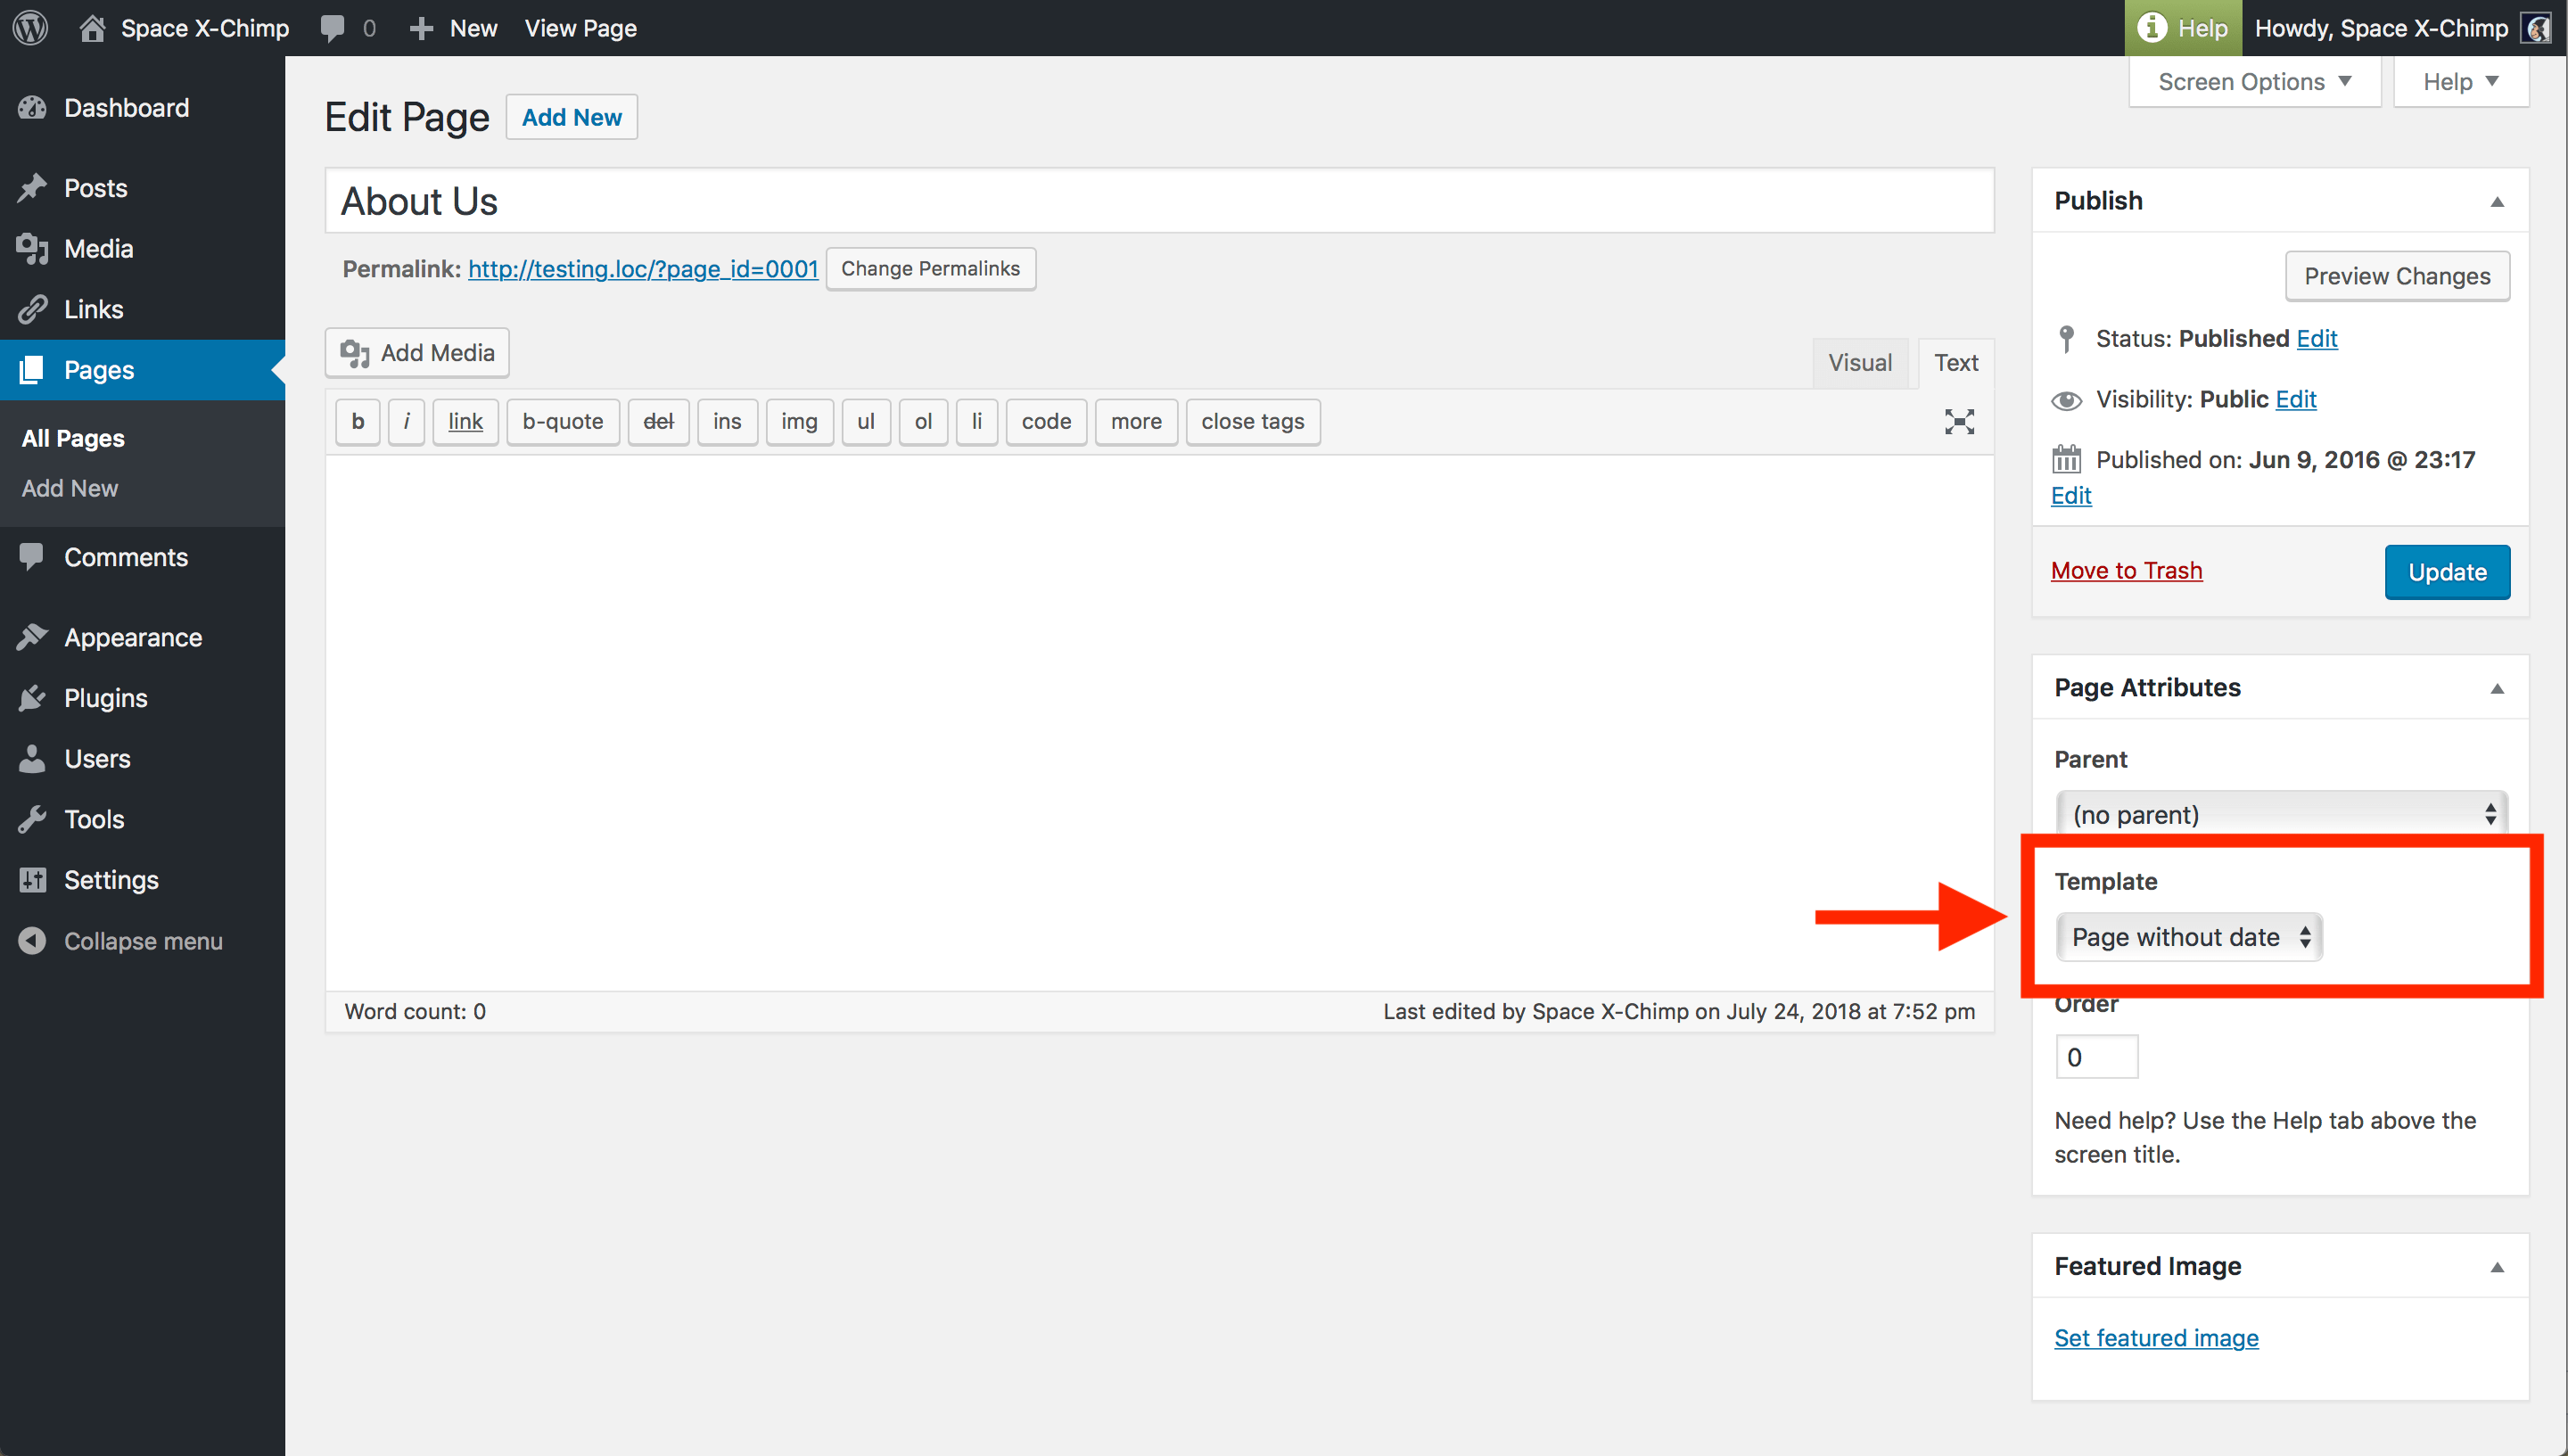
Disable “Yellow Sticker” on certain page
To disable the “Yellow Sticker” date tag on a certain page, you can use the special template called “Page without date”.
Replace “Yellow Sticker” with “Red Ribbon”
Unfortunately, there is no way yet to replace the “Yellow Sticker” date tag with the “Red Ribbon” date tag like the one in the “Anarcho Notepad” theme. Sorry for the inconvenience. But there is good news. We already received a request for this new feature, and we immediately begin work on creating an update of the theme to make our lovely customers happy. So in the upcoming update, among the new features, there will also be a new option that will give you the opportunity to choose between the “Yellow Sticker” date tag and the “Red Ribbon” date tag. We will do our best to better develop the theme and add the requested feature as soon as possible.
Integrate social icons
To integrate social icons into your website, just use our WordPress plugin called “Social Media Follow Buttons Bar”. You can find the plugin here :
- Free version : https://wordpress.org/plugins/social-media-buttons-toolbar/
- Premium version : https://www.spacexchimp.com/plugins/social-media-buttons-toolbar-pro.html
We also use this plugin on our website. But note that on our website we use a development version of this plugin, so that some features of the social icons that you can see on our website are not yet added to the released version of the plugin. Before adding new features to the plugin, our engineers carry out a complete testing process on our website, and so now some features of the social icons are undergoing testing and will soon be added to the released version.
Gutenberg editor
The “Simple Notepad” theme is support the new Gutenberg editor. Since the Gutenberg editor has not yet been released, its support may not yet be complete, but we will fix this in future releases of the theme.
Troubleshooting
As with every theme, it’s possible that things don’t work. It’s impossible to tell what could be wrong exactly.
The most common cause of any type of problem experienced by users is the website cache and the theme conflict. Our theme is compatible with most third-party plugins. But, unfortunately, we cannot check it with all third-party plugins (especially paid ones) for compatibility, therefore there are cases when the theme does not work with a third-party plugin. We constantly check our theme for compatibility with third-party plugins. If we find that our theme is incompatible with a third-party plugin, and if we can fix it on our part, we release an update of the theme to fix the problem.
Perhaps the problem will be solved by one of the following solutions. Please try this and let us know. Thank you!
- Please try to clear your browser’s cache. Every web browser stores a cache of the websites you visit (pages, images, and etc.) to reduce bandwidth usage and server load.
- Please try to clear your website’s cache created by any kind of caching system, it could be a WordPress plugin or a web service such as the CloudFlare.
- Please try to re-login to your WordPress website.
- Please try to restart your computer or try on another computer.
- Please try to temporarily disable all plugins and сheck if the issue persists. If the problem is gone, then the problem is in conflict with a plugin installed on your WordPress website.
Bug report
Bug reports are very welcome! Please visit our contact page and report. Thank you!
Please include as much information as possible, including a link to your website where the problem can be seen (if applicable). Describe in more detail what exactly you are seeing. Here are some examples:
- Elements of the theme are not working.
- An error message is displayed on the back-end of website.
- An error message is displayed on the front-end of website.
- Website is crashed.
More help & support
If you have any questions that are beyond the scope of this documentation, please read the Frequently Asked Questions. If you still can’t find an answer to your enquiry, please don’t hesitate to contact us and we’ll be happy to help you out.
Answers to common questions about licenses, payment process, refunds and customer support can be found on the page Common Questions.